In my last post I showed you how I go about selecting beads for my highly ornate bracelets. This is the second post of three, where I will show you how I go about preparing the beads as wire charms to add to my bracelets.
Post 1: The design stage. In my previous post I explained how I fiddled to create the bead collection.
Post 2: Preparing the beads. On the this post I show how to prepare the beads for the wire bracelet.
Post 3: Making a bracelet. And the final post shows me putting the whole bracelet together.
Wire wrapping a headpin
There are hundreds of online videos which show how to make wire wrapped loops in detail. Here are some good quality links:
If you have never tried wire jewellery making it is very easy to learn and tools are found in all craft shops around Australia. I suggest you explore the above tutorials with a cheaper 24 gauge craft wire.
For my slideshow below I focus on the creative approach where you cluster the beads into mini works of art!
This makes the finished bracelet exciting to explore, and gives it life for the wearer and the viewer.
This is for a rainbow bracelet.
In my last post I mentioned that I don’t really like rainbow myself, I prefer to select a natural palette, more organic inspired. Rainbows to me are bright, colorful things with bright yellow .. I don’t do bright yellow either. I am really working against my personal taste here but the order was for a Rainbow Bracelet, of all colors, to be a bright and splashy mixture.
I still use the highest quality beads, beautiful Czech glass fire-polished beads and Japanese Toho glass seed beads .. even if they are bright yellow. And for the record: I don’t actually like the finished story board either being its so rainbowish lol.
Also please remember this is a WORK IN PROGRESS, the finished result is still another post away, so be patient, stick to a vision and in the end result will be perfect!
So I hope you enjoy the slides below, please feel free to ask any questions via the COMMENTS below and LIKE onto Facebook above!
ALWAYS THE ARTIST
Dina
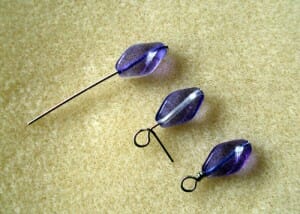
From the last post, I had selected these beads gradually to build up a rainbow of colors.
The fun process begins by clustering the beads so they make miniature art by themselves. Here I have used 24 gauge head pins: large beads are either by themselves or with a small seed or two. See the light blue, green, purple and red beads on the left, they have various combinations of 0-1-2-3 seed beads. Note each bead type has an identical combination this provides some uniformity / predictability in the mass cluster.
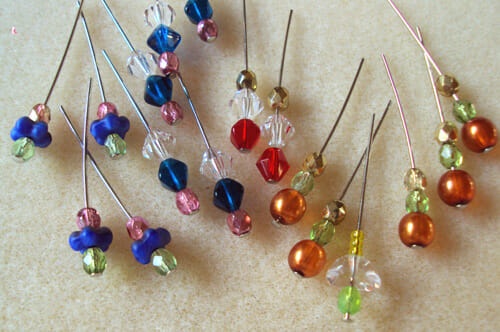
Now you can see how beautiful the individual beads are when teamed in the right combination! Vary size, consider which bead is the prominent end color, find is optimum partner combination, and keep the combinations in identical clusters.

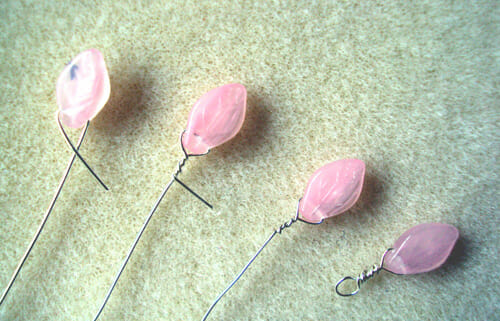
Here the flowers come to life with stamen and stalks.
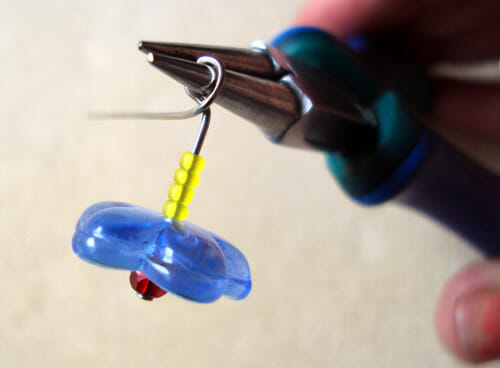
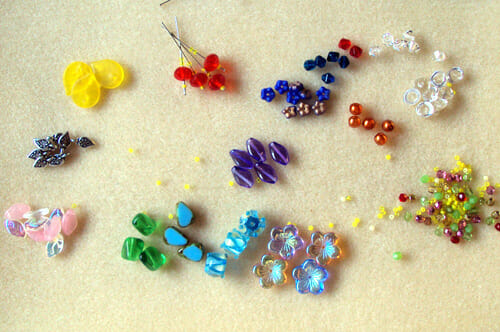
Referring to the links above begin the wrapping process. In this picture I have begun the loop using round nose pliers. Note you need the right tools for this task! I love the little seed bead stalks.

Here is the process of wire wrapping head pins, again refer to the video links above for more detailed explanations.
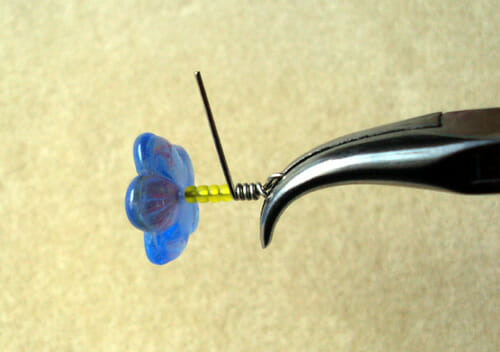
Wire-wrapping the loop into place.
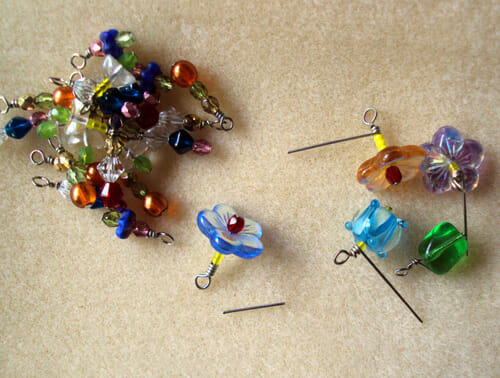
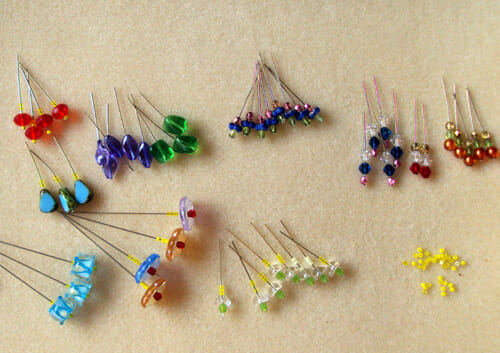
And gradually, several hours later the completed pile is building up, the tails are being trimmed and neatly pushed into place.
The leaves I do slightly differently as they have horizontal holes, not vertical. I use 24 gauge artistic wire, in this case silver for the project. I attach the leaf as per the first 3 examples and then make the standard wrapped loop which I have done for all the other beads.
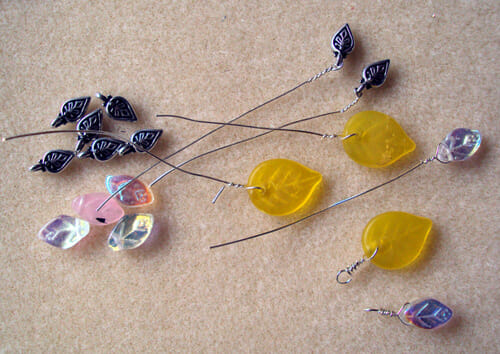
And slowly complete the various leaves.
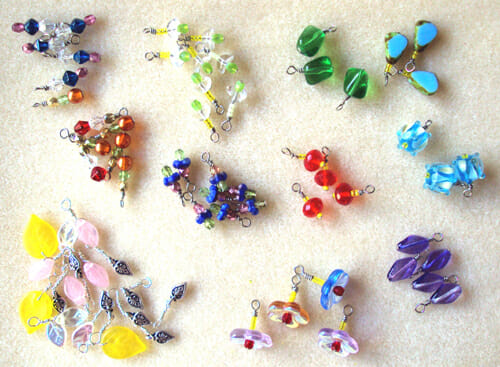
Until all the beads all threaded, with loops, wrapped and trimmed ready to begin the final stage .. construction! And that my dear friends is still another post away so please SUBSCRIBE on the right for your weekly email notification of my latest posts.
See you next post where I create my unique ArtLinks bracelets!